DIY - Faux Brick Wall
How to apply Peel & Stick Wallpaper
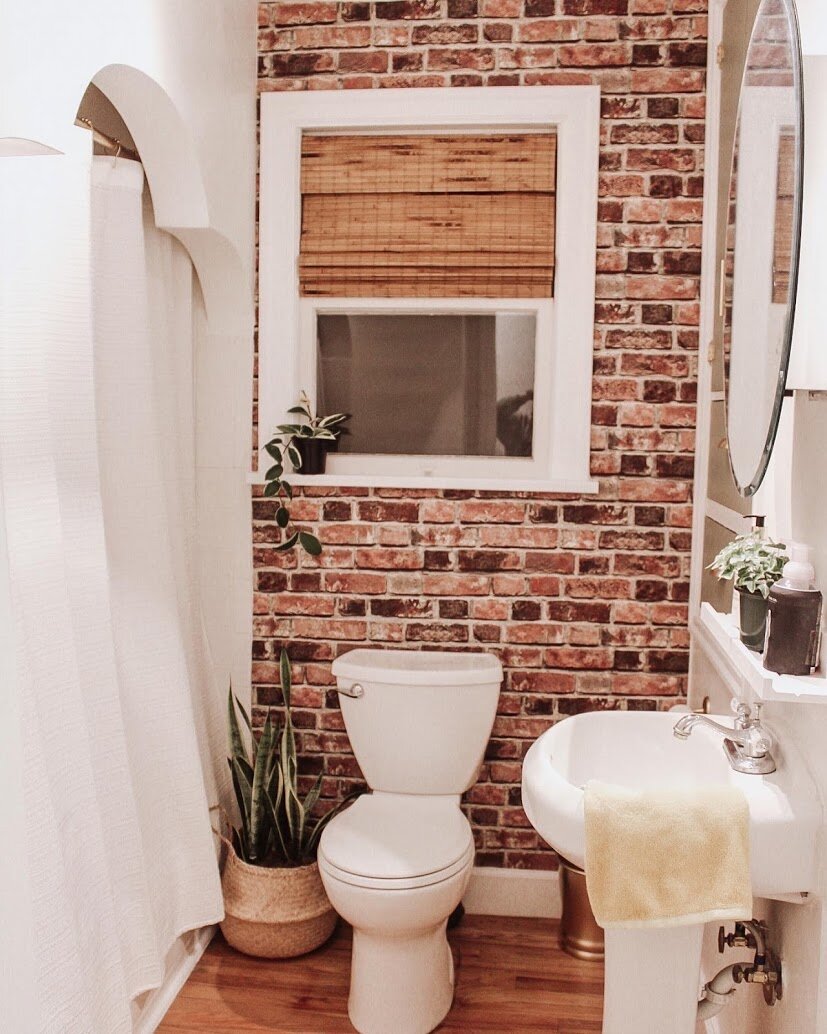
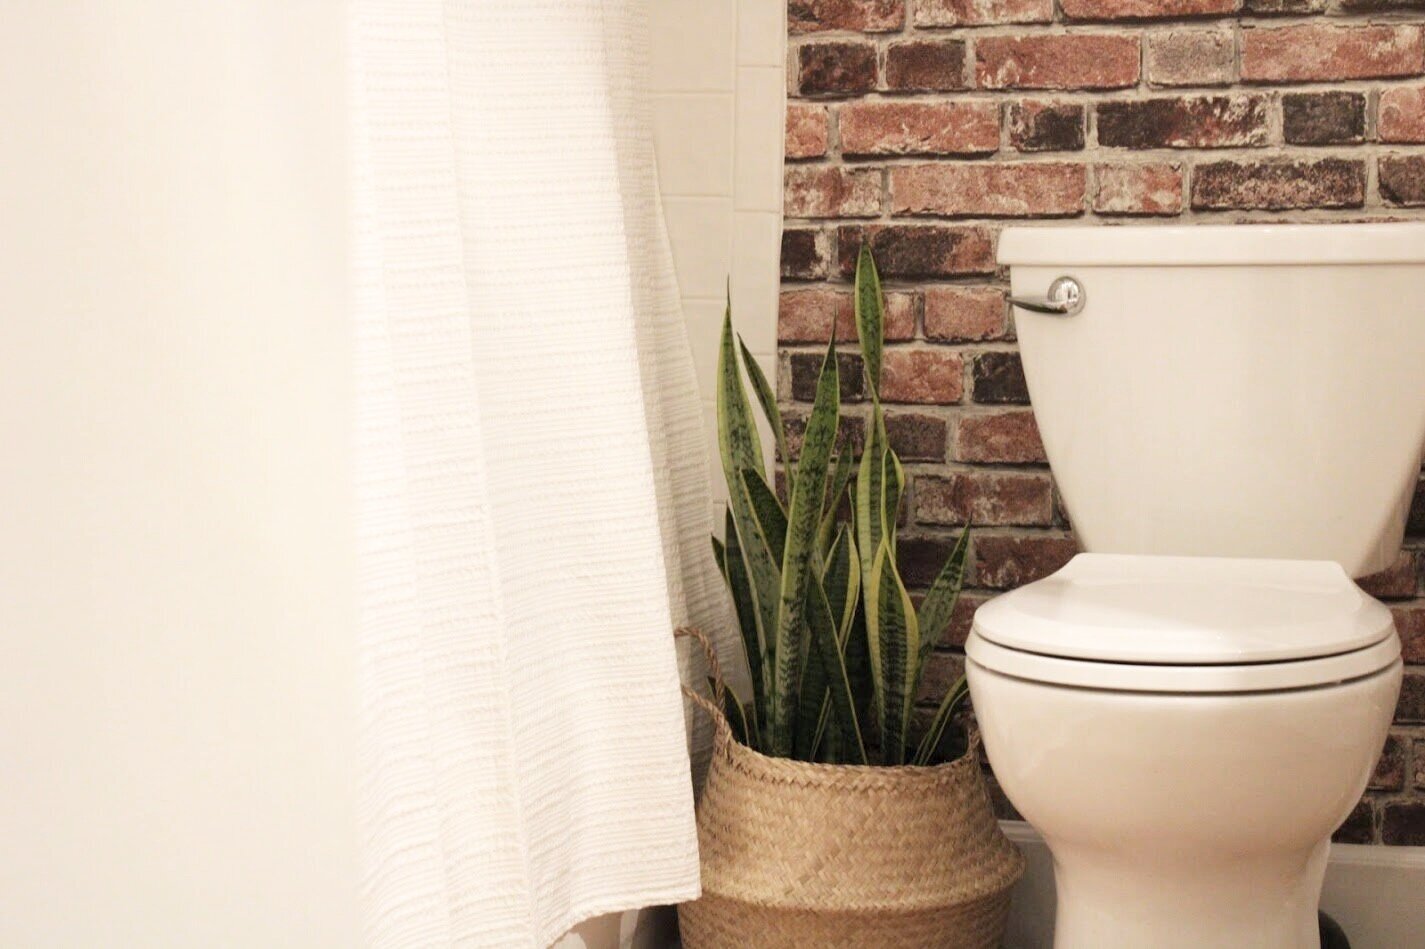
Transform your Bathroom
with Faux Brick Wallpaper
Transform your space with an easy DIY Project for under $50!!
Materials Needed:
Beer (Let’s try a porter)
Tape Measure
Sponge / Rag
Dish Soap Mixed with Water
Ladder (if your short like me)
Wallpaper installation kit (knife/ squeegee)
Step 1: Lets grab your DIY Beer
My project beer is: Outer Range’s Kinfolk Porter
Outer Range Brewing Company is one of my favorite breweries here in Colorado. They have amazing beers (especially IPAs) and one of the best locations.

This beer was so yummy! It hits you with this toasty toffee and caramel flavors. It’s exactly what you look for in a porter. I highly recommend - a very comforting beer for any project.
I am loving Porters this time in the year. They are perfect winter beers. Anyone have any good porter recommendations? Let me know in the comments.
Step 2: Measure your wall
Use a tape measure to figure out the square footage of the wall.
The best thing to use is the Home Depot Wallpaper Calculator.

Before Photo
Step 3: Source Materials
(Wallpaper/ Wallpaper Installation kit)
I did a lot of research before picking the brick wallpaper. I didn’t want to buy anything too expensive, because what if I hated it… I knew I wanted “peel and stick” wallpaper. I was nervous because some of the brick peel and stick wallpaper look very fake. So I found this one at Home Depot. The reviews were good and it was in my price range. I ended up only buying one role for my wall.
I also bought the entire WallPaper Kit from Amazon. It came with 2 squeegees, the craft knife with replacement blades, a tape measure, and a vinyl cutter which I didn’t need but it will definitely come in handy one day.
Step 4: Prep your wall
Remove all hardware/nails/etc.
Clean it. Use a rag or sponge and mix dish soap and water into a bucket. Wipe the wall with the soapy mix to remove the nastiness that’s on your wall (theres a lot of dust & dirt). Allow to dry - the longer the better.
Just wait and enjoy your beer.
Step 5: Start from the Top!
Okay, so this is the not so fun part. I messed up A LOT. Just an FYI, I got super frustrated throughout the entire process of installing wallpaper. Its worth it but trust me you will get annoyed. Don’t give up & take (beer) breaks.
Start from the top. Peel back the paper around 8-12inches. Line it up to the top of your wall where it meets the ceiling. Slowly (MAKE SURE YOU DO THIS SLOW) peel and stick the paper down the wall. Continue pressing as you move the wallpaper down the wall.
If you have windows/doors then good luck (haha - but really). Keep peeling super slow and go around the window/doorway trim using the squeegee. You will then have to use a utility knife or carving craft knife to cut the wallpaper around the trim. Do this carefully I got a little too excited and cut too much on an angle and ruined the wallpaper. That was fun to fix.

Once you reach the bottom of your trim or flooring use your craft knife to cut the bottom. Cut slow so it’s straight.
Smooth the wallpaper using the squeegee from top to bottom and left to right around the trim. You want to get rid of air bubbles.
Step 6: Line up the brick pattern
This is also not fun. Once you have your first strip of wallpaper on your wall make sure you line it up with the next strip to match the brick pattern. You might have to cut off some of the wallpaper to get it to match the first strip pattern. This can take a while. Try not to get frustrated. Take a step back and enjoy your beer. Take in the process. You got this.

I ended up installing the wallpaper at the bottom of the window trim to match the brick pattern easier.
Step 7: Continue Step 5 & 6 until your wall is covered.
Keep applying the wallpaper from the ceiling to your trim. Line up the brick pattern each time. Constantly use your smoother squeegee. Remember take breaks. Come back to it the next day do whatever you got to do to not rush and mess it up!
Step 8: Check for air bubbles
Once the wall is covered make sure all air bubbles are smoothed out with the squeegee thing.
Step 9: Look at the beautiful wall YOU just created & reward yourself with a cold one.
